Simplifying Consent Management with Usercentrics in VueJS
Managing user consent for third-party services in VueJS projects can be a breeze with the right tools and approach.

Three tech people busy in their workplace - Image by Lemannas from Canva
Hello, everyone! It’s great to be back.
Recently, while working on a project, I had to work on integrating Amplitude for analytics. While this wasn’t a new task for me, but following the task, I also needed to ensure consent management for the data that our web app would use, especially since the app had already been launched!
So, recalling the notes that I made while doing the task, in this guide, we’ll walk through the process of setting up and integrating Usercentrics for consent management, ensuring compliance with legal requirements while keeping our code organized and efficient.
Setting Up Usercentrics
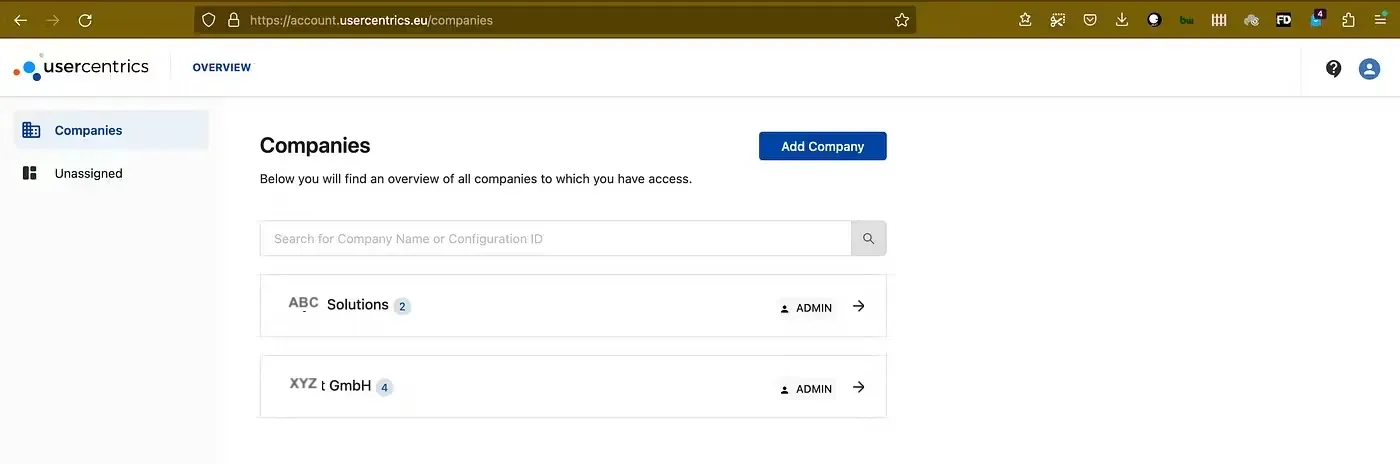
- Create Organization and Configuration: Sign in to Usercentrics and start by creating an organization and configuration within Usercentrics.
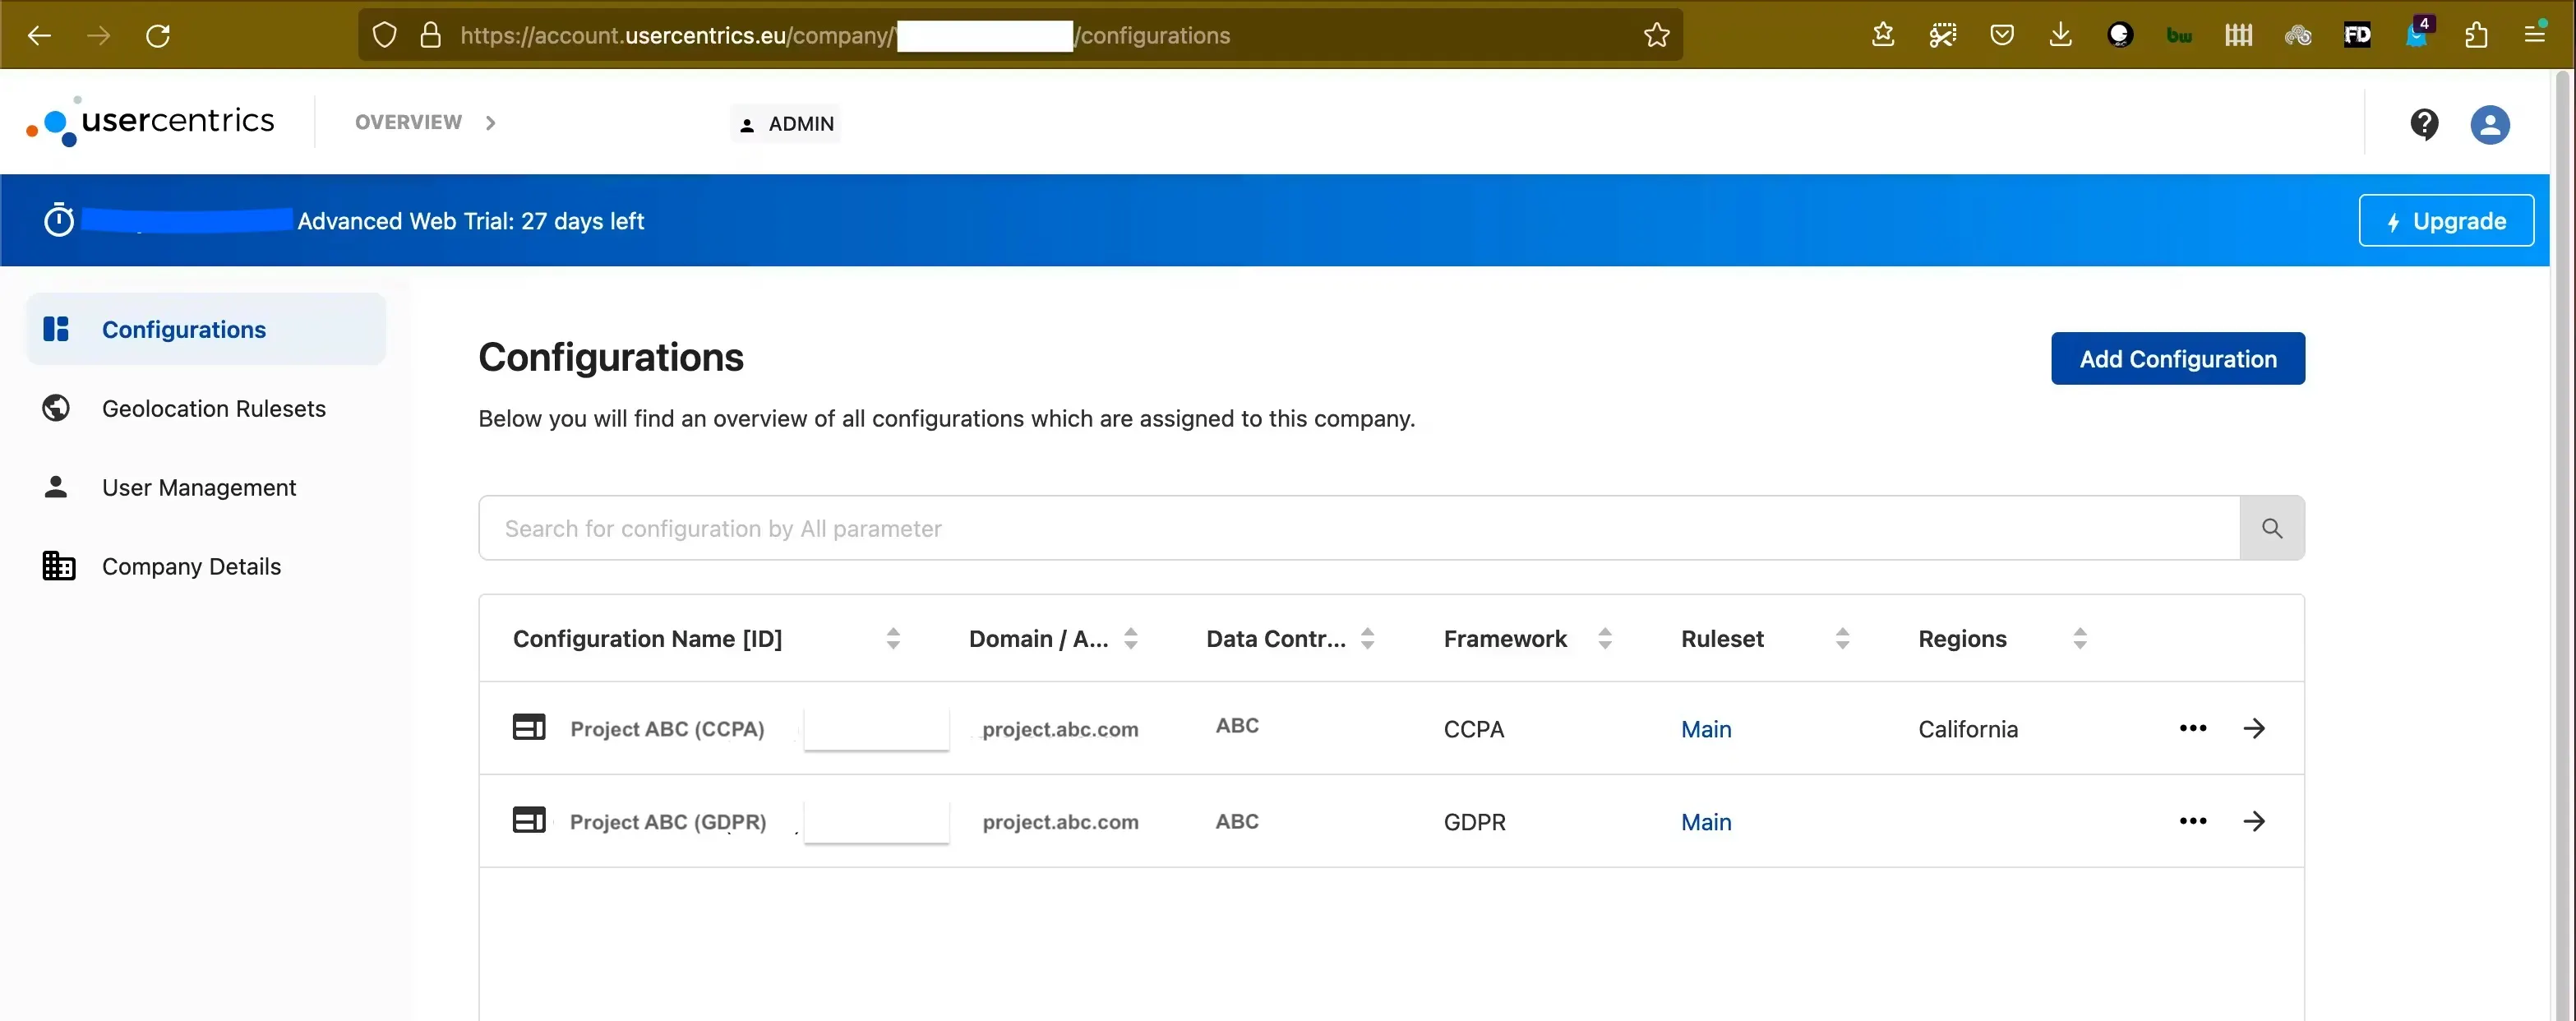
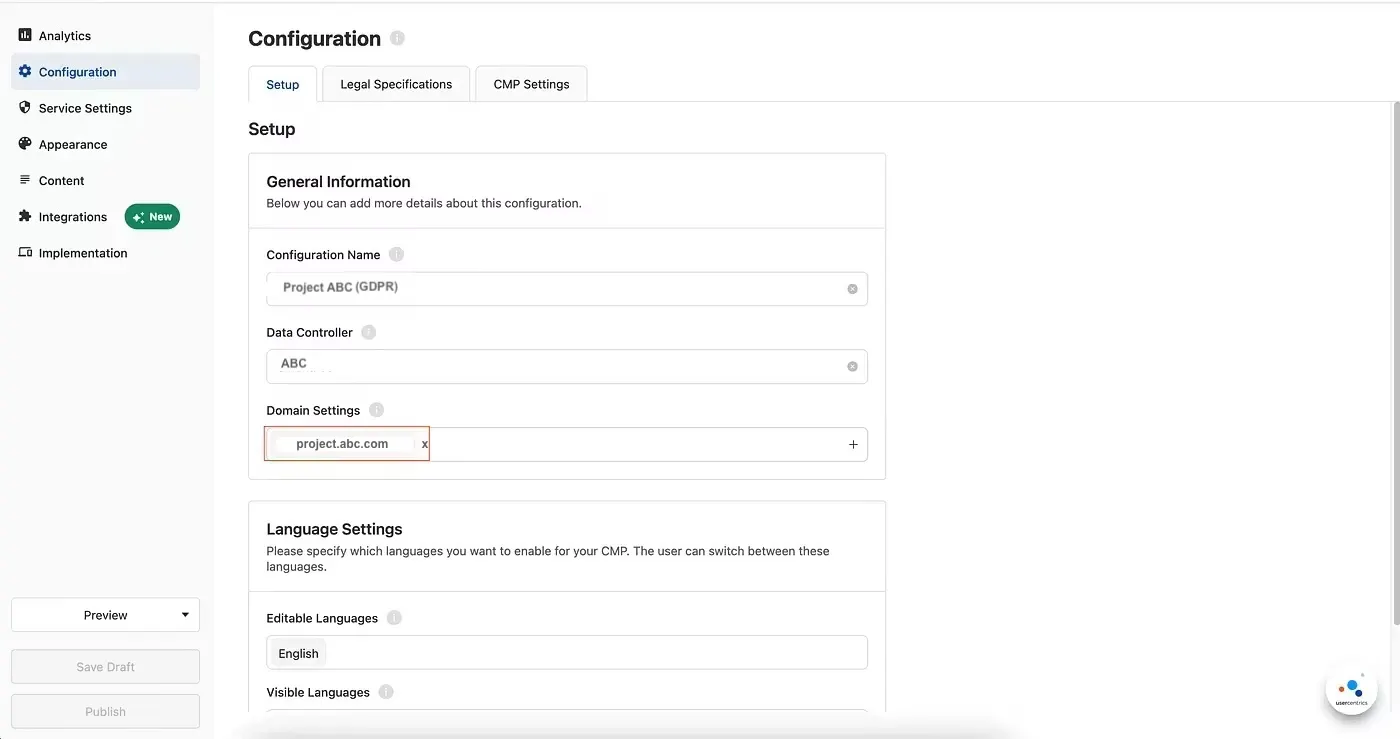
Once you’ve created a configuration, in the domain setting field, input the domain where the cookie-service(third-party) has been used.
In our case, Amplitude was already integrated into our project, therefore, upon the initial scan of the DPS, the service was listed in the DPS list. If the name for the service is unknown, you can save it as a custom DPS(clicking Add Service) based on its domain.

2. Customize Consent Banners: Once configured, customize the consent banners to match your project’s aesthetics. Usercentrics allows you to tweak the appearance and content of the banners to some extent, ensuring they align with your branding.
3. Preview and Publish: After making changes, preview the draft to ensure everything looks good. Once satisfied, publish the changes to make them live.
Integrating Usercentrics into VueJS
1. Insert Scripts: Begin by inserting scripts into the index.html file of your VueJS project. These scripts install the Usercentrics API and are crucial for the consent banner to appear correctly.
 <script
  id=”usercentrics-cmp”
  data-settings-id=”XXXXXXXX”
  src=”https://app.usercentrics.eu/browser-ui/latest/loader.js"
  async>
 </script>
2. Additional Recommendations: Usercentrics recommends adding preconnect and preload links to improve performance. These should be added as the first lines inside the <head> tag.
 <link rel=”preconnect” href=”//app.usercentrics.eu”>
 <link rel=”preload”
  href=”//app.usercentrics.eu/browser-ui/latest/loader.js”
  as=”script”>
3. Troubleshooting: If the consent banner doesn’t show up, double-check the “Show CMP” box under the Legal tab in the Configuration section. This step is required, especially for legal frameworks like CCPA.

Customizing Consent Management
1. Define Consent Store: We will be using Pinia to define a store for consent management. This store will store user preferences for each service.
 import { defineStore } from “pinia”;

 export const useConsentStore = defineStore(“consent”, {
     state: () => ({
     services: [],
   }),
   getters: {
   getConsentValue: (state) => (serviceName) =>
     state.services.find((service) => service.name === serviceName)?.consent?.status,
   },
   actions: {
     saveServices(services) {
       this.services = services;
     },
   },
 });
2. Create Consent Component: Develop a Vue component dedicated to consent management. This component will handle events triggered by Usercentrics and manage user preferences accordingly.
<template>
   <div>
     <! — You can add any additional markup or styles here →
     <slot></slot>
   </div>
</template>

<script setup>
  import { useConsentStore } from “@/stores/Consent”;
  import { UC_UI_CMP_EVENT_TYPE } from “./../cmp/constants”;

  const isUCUICMPEvent = (event) => event.type === “UC_UI_CMP_EVENT”;
  const consentStore = useConsentStore();

  const clearCookies = () => {
     //this function should clear all the current cookies
  };

  const setServicesInfoCallback = () => {
     const services = window.UC_UI?.getServicesBaseInfo();
     consentStore.saveServices(services || []);
  };
  const ucUIEventCallback = (event) => {
     console.log(“Current event: “ + event.detail.type);
     if (!isUCUICMPEvent(event)) return;
     switch (event.detail.type) {
       case UC_UI_CMP_EVENT_TYPE.ACCEPT_ALL:
         setServicesInfoCallback();
       break;
       case UC_UI_CMP_EVENT_TYPE.DENY_ALL:
       case UC_UI_CMP_EVENT_TYPE.SAVE: {
         clearCookies();
         setServicesInfoCallback();
       }
     }
    };
    window.addEventListener(“UC_UI_CMP_EVENT”, ucUIEventCallback);
  </script>
3. Wrap Main Component: Wrap your main component (usually inside App.vue) with the <Consent Manager> component to ensure integration of consent management into your Vue app.
Final Touches: Enabling Third-Party Scripts
Check Consent Before Initialization: Before initializing third-party services, such as Amplitude, check if the user has given consent. If consent is granted, proceed with initialization.
const consentStore = useConsentStore();
watch(services, () => {
   const hasConsentForAmplitude
         = consentStore.getConsentValue(SERVICE_NAME.AMPLITUDE);
   if (hasConsentForAmplitude) {
     initAmpli();
   }
 });
Conclusion
With Usercentrics and VueJS, managing user consent becomes a straightforward process. By following these steps, you can ensure compliance with legal regulations while providing a seamless experience for your users. Happy coding!